
This Winter Sowing Method is as easy as it gets. It’s the simplest, and most budget friendly way to grow hardy perennials and native flowers.
When it comes to Seed Starting, there are a variety of methods I use. When I was growing thousands of perennials each year for my backyard nursery, I had two seed starting methods that I used most: The first was Starting Seeds Indoors under lights. This produced great results in terms of seed germination but required a lot of infrastructure and constant attention to the vulnerable seedlings.
The second and much more set it and forget it method was Winter Sowing Seeds in Milk Jugs. Germination rates were much less but I loved the simplicity of it and this is one of my go to methods today.
Over the years, I’ve become a big fan of simple when it comes to seed starting. And even though winter sowing seeds in milk jugs is very simple and straight forward, there’s an even simpler method! I call it the ‘Open Pot Method’.
About The Open Pot Method
The method is simple. You put potting mix in pots and plant seeds in the potting mix. Then you put the pots outside in early to mid winter and that’s it. Mother nature does the rest. In the spring as temps warm and sunlight increases the seeds germinate, just like they would in nature. The main benefit of placing the pots outside all winter is the seeds get to go through a period of cold stratification which is often necessary for optimum seed germination results.
What Seeds to Sow
In my experience Native Flowers and Hardy Perennials tend to work best for this method. Check out this awesome resource where you can enter your zip code and see which plants are native to your area:
https://nativeplantfinder.nwf.org/
Here’s a great list of Hardy Perennials that I recommend for this method:
Also, feel free to experiment. You never know what might do best in your micro climate.
Materials and Tools Needed
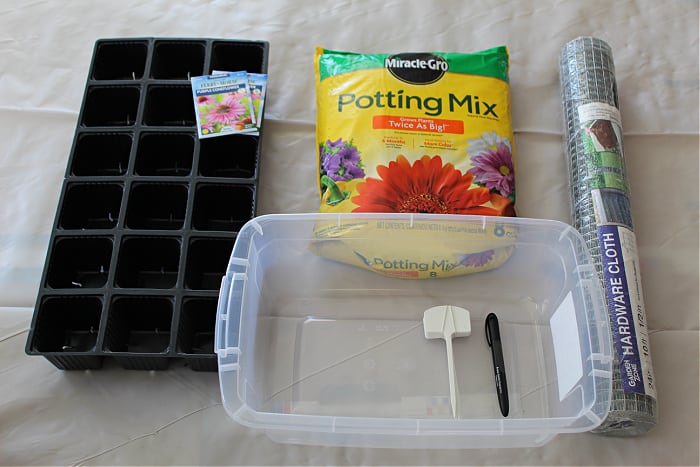
- Potting Mix (not potting soil)
- Pots- I like to get 18 count cell. Don’t go too small since you want to sow several seeds per pot. These Pots from Johnny Seed company are a good choice.
- Animal Barrier
- Labels and Waterproof Marker
- Plastic Tray
- Seeds
Winter Sowing Step by Step
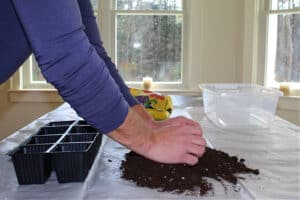
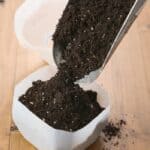
1. Prepare Potting Mix
Pour out the potting mix and use your hands to break apart any clumps and loosen up the potting mix.
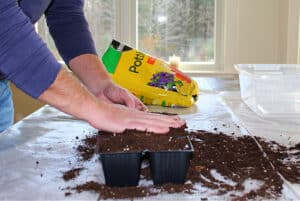
2. Fill Pots with Potting Mix
Fill the pots to the top with potting mix, lightly tamp down with your hands or use the bottom of another pot. Then top off each pot with some more potting mix and lightly tamp again.
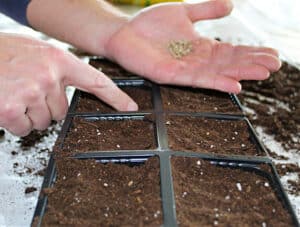
3. Sow Seeds
I like to pour the seeds into my hand and grab them one by one, and gently push the seed into the potting mix with my finger. For an average sized seed I like to sow 4 seeds per pot. With smaller seeds I’ll increase the amount I sow per pot. For really small seeds I’ll just sprinkle them right from the seed pack by flicking the seed packet.
As seeds germinate in the spring/summer use a pair of snips to thin out the weaker seedlings that germinate.
For most plant varieties I like to thin each pot so that only one seedling grows per pot. But for plenty of plant varieties you can grow multiple plants per pot if you wish.
When thinning, I definitely recommend using snips instead of pulling seedlings out. Pulling on unwanted seedlings may disrupt the nearby root system of the seedling you are trying to get established.
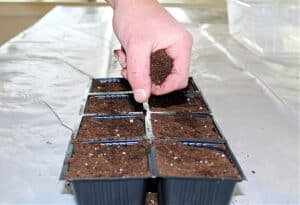
4. Cover Lightly with Potting Mix
Generally speaking, a seed should be sown at the same depth as the size of the seed. So larger seeds should be covered with more soil than smaller seeds. So before spreading too much potting mix over the top of your seeds, make sure you consider the size of the seeds your sowing. For really small seeds, I won’t even cover them with potting mix, I just sprinkle them on the surface and press them in with my fingers so they make contact with the potting mix.
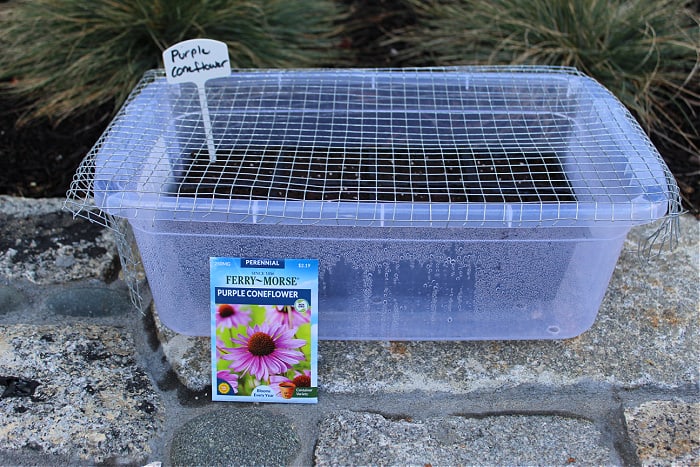
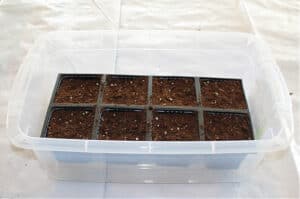
5. Place Pots In Container and Water
Get a plastic container and drill or cut some drainage holes along the bottom. Place the pots in the plastic container and spray them with water so the surface is wet. I like to use a spray bottle instead of a watering can because I want to be extra careful during this first watering, making sure I don’t disturb the seeds by forcing a heavy stream of water over them.
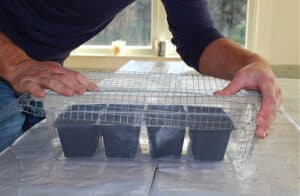
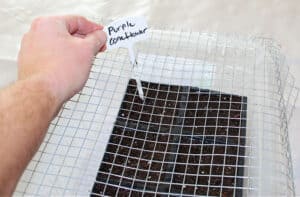
6. Cut and Install Animal Protection
Use wire cutters or a utility knife to cut your metal animal barrier to size. Leave about 4” overlap on all sides of the plastic container so you can fold the animal barrier into place.
7. Label Pots
Don’t forget to label your pots, it’s easy to forget what you have planted by the time spring comes around. I like to only sow one variety of seed per container to keep things simple and organized.
8. Move Outside
Move the container with your pots outside so it is exposed to the weather elements. Choose a part sun location, away from overhangs. You don’t want heavy snow or rain coming from the roof or an overhang onto your seeds. From here on the rest is up to mother nature.
In the spring/early summer you should see your seeds germinate as soil temps warm. Once germination has begun, thin out weaker seedlings. At this point you want to keep your seedlings watered so the soil is moist, but not completely soaking wet all the time. Allow the plant to grow in the pot before transplanting into a larger pot or into your landscape.
Video of Process
For a visual look of the process look below:
Check Out These Posts Next


Follow Me
Join my free email list!
Leave a Reply