
Most homeowners struggle to get clean, well defined garden edges. But using this simple tutorial, you can learn to edge a garden like a pro.
1. Layout
Before you edge a garden you have to first nail down your layout. Choose between an edge with curves, or a straight line. For a more natural look choose to curve your edges, for a more formal feel then choose a straight line.
To layout a straight line use two stakes and string a line in between the two stakes. This is the only real way to get a straight line.
If you’re curving your landscape edges then a little more thought is required. Using a garden hose, experiment with laying the hose on the ground to adjust the shape.
The key to curved beds is to make large, smooth, flowing curves that look natural. Stay away from sharp turns and tight radius’s. If you have a 30′ bed with a small little 2′ curve in the middle it will look unnatural.
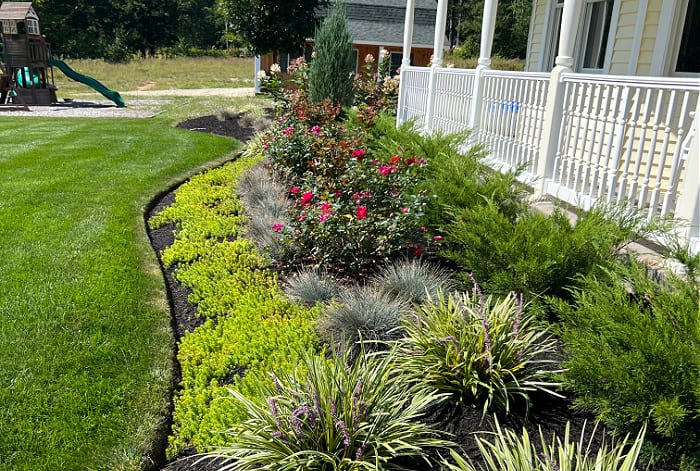
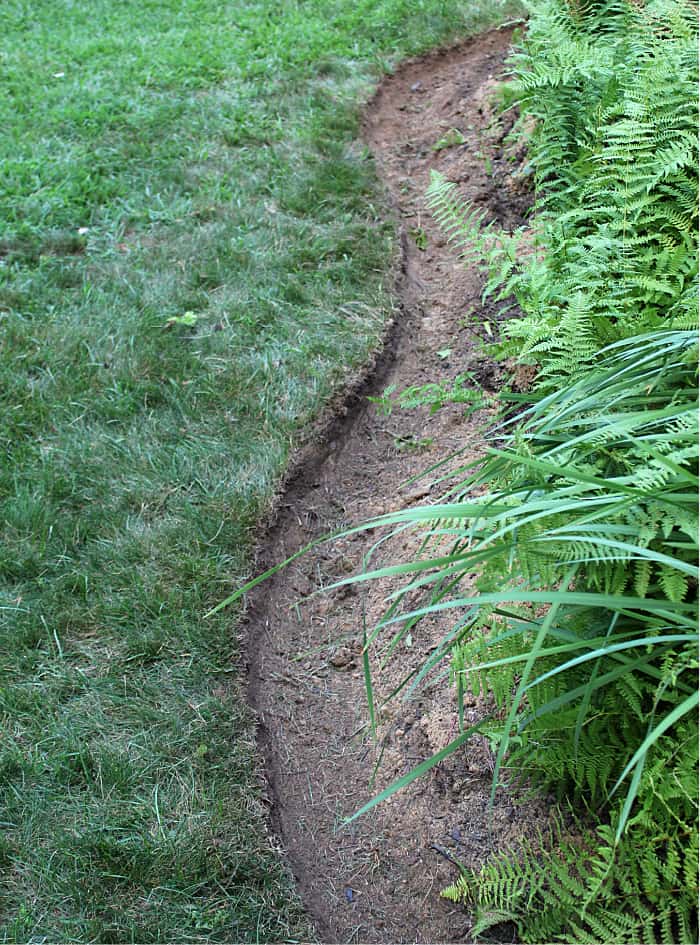
Take a look at the pic below. This is the layout for a flower bed that I am redoing along the back of my house. I’m making it into more of a kidney shape. You can see how it flows without interruption.
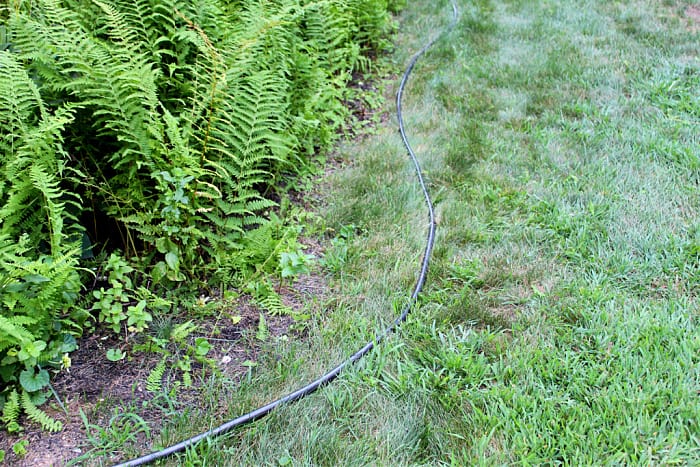
*Tip- Lay the hose in the sun for awhile beforehand to soften it up. Also don’t worry if the hose doesn’t lay down perfectly smooth. The hose is for a general outline, your final edge will be much smoother.
2. Choose Your Tool
Personally, I like to use an edging shovel to edge a garden, or reshape existing edges. They are easy to control, edge deep, and are versatile since you can use the edging shovel for cleanup as well.
Your other option is to use a half moon edger. Plenty of people prefer half moon edgers so it really is a preference. Either one of these tools will do the job.
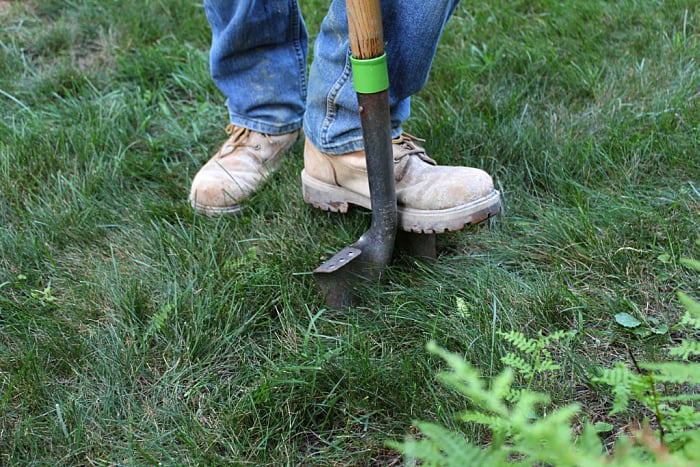
3. Transfer Shape
Once your line, or curve is laid out, it’s time to transfer that line onto the grass. In this step, your only focus is to go along your layout and press your edging tool into the ground with your foot. Don’t worry about going too deep yet. For now you just want to make a small impression in the grass.
![]()
Once you transferred the shape of your garden edge onto the grass you can remove your line, or hose that was marking the layout.
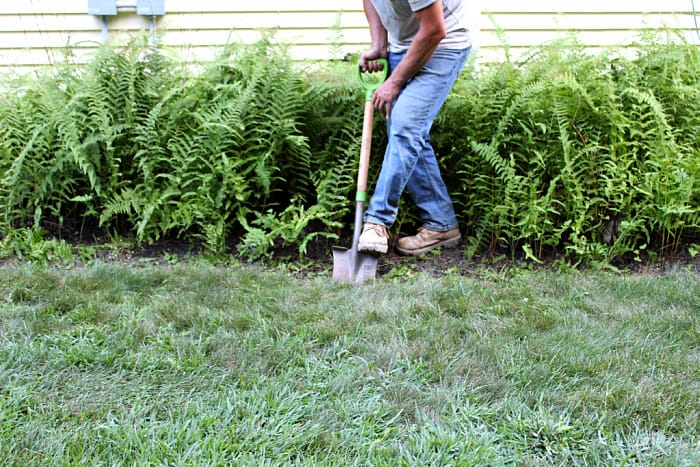
4. Dig Deep
Now that you have carved out the shape of the garden bed with your edging tool of choice, it’s time to retrace your steps and dig deeper.
Go over the same shape shape you just laid out, only this time press deeper into the edge by applying more pressure with your foot. I like to dig in about 5 inches. Don’t skimp out on this part, deep edges give you a really defined edge and are easier to maintain.
5. Angle Cut
After you dug in along the shape of your garden edge, the next step is to make an angle cut on the inside of your edge.
This means turning your body around 180 degrees and digging into the edge at a 45 degree angle.
This step is just to make the edge easier to dig out and remove. Go along the entire inside length of your edge and make this angle cut using your foot to drive the edging tool into the ground.
6. Dig In and Pull Out
After making your angle cut, it’s time to turn back around to your original position.
Once again, dig your edging tool into the edge that you have outlined. This time, once you dig in, pull the grass out by digging the edger in and tilting it back and forth a couple of times to separate it. Then lift the material out and place it in front of your edge.

Here’s a close up:
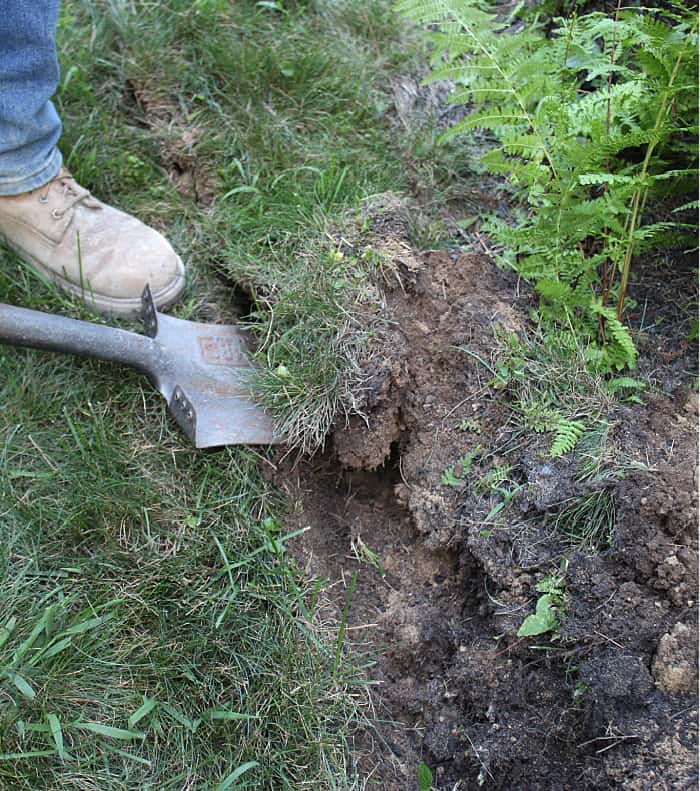
Don’t worry about cleanup yet. Just go around the entire length of your edge and continue lifting the grass out and pushing it forward. I find a flat edging shovel with a handle is extra helpful in this step. It’s easier to twist the edge out and gives you more control.
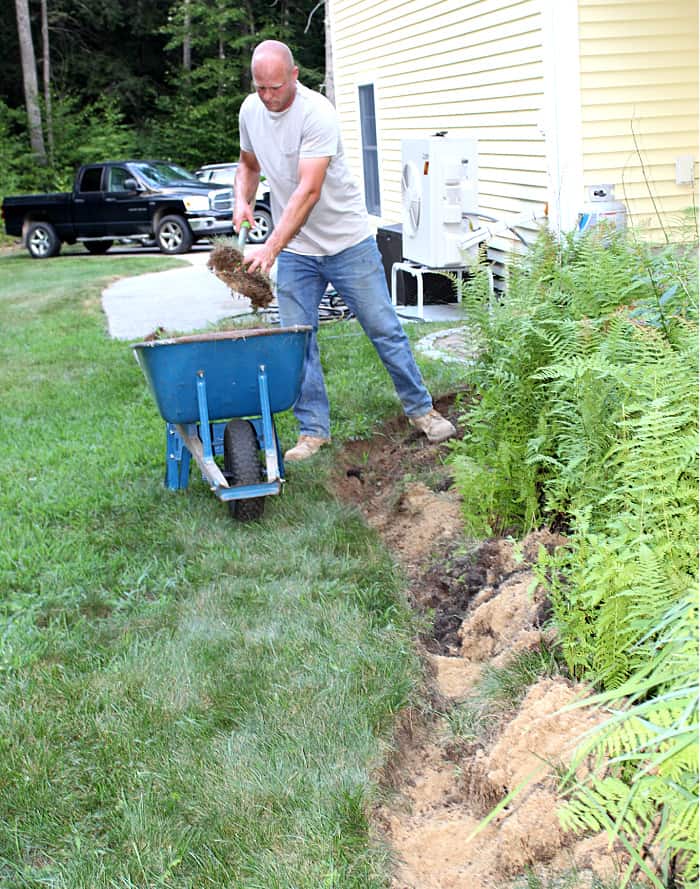
7. Clean Up
At this point you should have a visible, well defined edge with clumps, or strips of grass laying in front.
Take one last look along the length of your edge to make sure you are happy with the shape. Now is the time to make adjustments or smooth out any rough parts.
Finally, cleanup up the mess using a rake and shovel to remove the recently excavated grass.
8. String Trim Edge
After you edge a garden with your edger tool, the next step is key to getting that really professional, manicured look.
First, go around your edge and string trim it as you normally would when you cut your lawn. This first pass is to trim grass growing straight up and down as normal.

*Tip- When string trimming along garden bed edges, walk from right to left around your property (counter clockwise) to keep grass out of the garden bed.
After that first pass, make a second pass, only this time turn the edger on its side so the string will be cutting at an angle perpendicular to the edge.
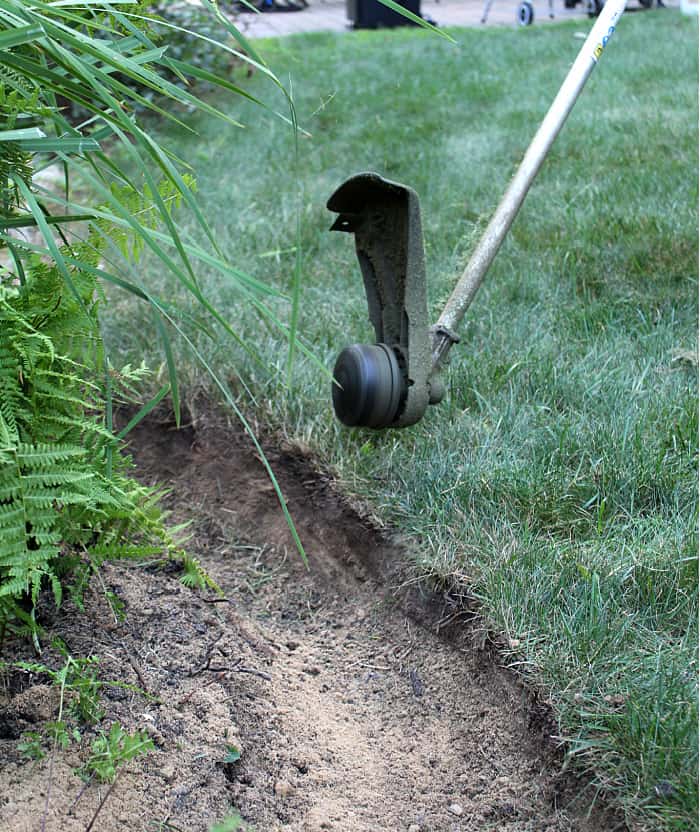
The idea in this step is to cut any grass that is encroaching into the newly created edge. Go slow and try and have a steady hand as you trim the grass. I like to tuck the end of the trimmer against my elbow and forearm to keep it steady.
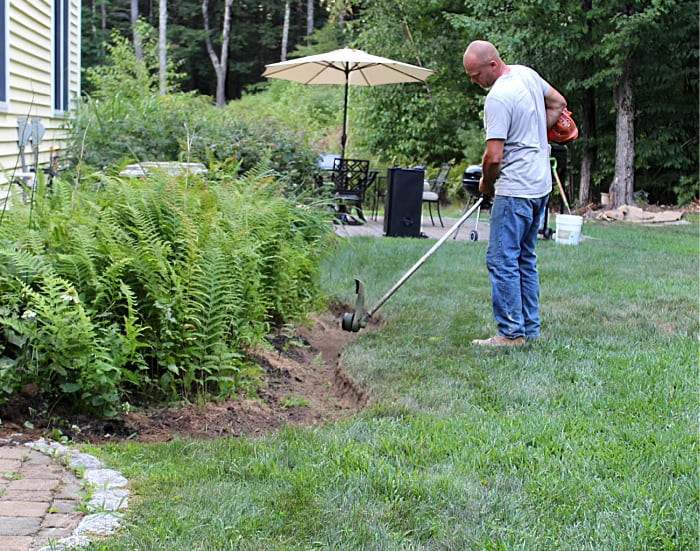
This takes practice but once you master this technique you will have the trick to creating really clean edges.
It’s a good idea to use this string trimming technique weekly on all your garden edges, edged flower beds, and even edges of your lawn that meet hardscaped surfaces.
Maintaining a clean landscape edge is much easier then having to reshape edges that have been neglected.
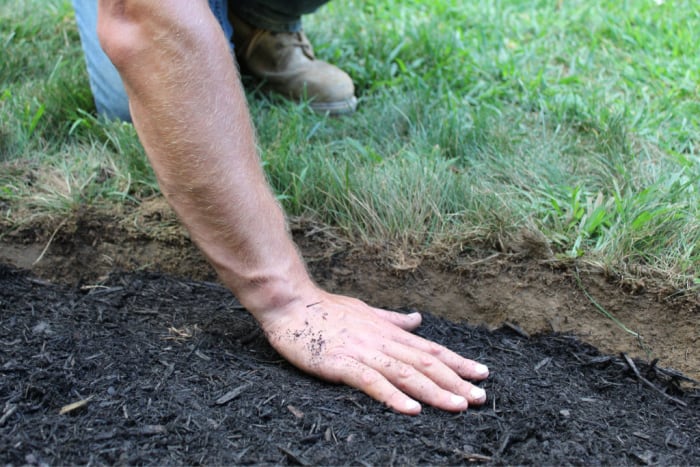
9. Add Mulch or Stone
At this point you should have a clean, crisp edge:
After you edge a garden bed, the next step is to add mulch or stone, or any other aggregate you plan on installing.
If you’re just doing a modest reshaping of an existing bed then you might get by with just raking some of the existing mulch or stone up to the new edge.
No matter what material you use, just make sure you leave it a couple of inches below the top of your edge. This will show a sharp contrast between your edge and mulch or stone.
How To Edge a Garden Bed Video
Check Out These Posts Next
Follow Me
Join my free email list!
Plus, follow me on Facebook, Instagram, and Pinterest.
I love being outside in my yard and keep it looking great! Thank you for the edging tips, I will definitely use this the next time I’m ready to edge or maintain my landscaping.
You’re very welcome Tami, I’m happy to hear I’m able to help!
This has been on my “to do” list for the spring, and I have been dreading it- you kind of gave me the boost to get out there after seeing your end result!
Thanks Karen! It’s one of those tasks that isn’t necessarily the most fun since there is a decent amount of labor involved but it makes such a difference! Good luck!
This is the best, and most thorough article about garden edging. Thank you very much for sharing.
My pleasure, thanks for your support!
I have a question. When finished and you add mulch, you said leave a couple of inches of mulch from the top of your edge, whereas others show it right up to the top. Doesn’t leaving a space from the mulch to the edge of grass cause the dirt from the lawn fall into the mulch when you cut your lawn? I’m probably not making sense. Sorry
I would definitely leave a couple of inches, if the mulch were right up to the edge it wouldn’t look so defined and it could wash out onto the lawn. The root system of the lawn should keep the dirt intact and prevent it from falling into the mulch.
Really nice! Thank you for taking the time to share this!
My pleasure, thanks for reading!
This is the most simple, yet informative and detailed article about edging I have ever read!
Thanks for the pix and inspiration!
Sheila
That makes me so happy Sheila, thanks so much for taking the time to leave such a great comment!
Many thanks for that thorough explanation. I would like to do this and also edge with brick/stone.
Have you any advice?
Hi Jean! If you’re going to use brick or cobblestone or something like that I’d first tamp down the area where the stone is going to compact it. Then I’d put down a small bed of sand, this way the stone is sitting on sand.
Great write-up! We’re looking to redo our existing bed in front of our house full of overgrown 20-year-old shrubs, grasses, etc. Articles like these are super helpful and motivating! Thank you!
You’re very welcome Mike, I’m happy to hear you enjoyed it. Have fun redoing the landscape bed!
My edging, black plastic edging done by the home builder, is above the lawn edge in places and below in others. It’s not easy to trim or mow around. Any suggestions?
Hi Bob, Personally, I really don’t like the black plastic edging. Back when I was landscaping so many people would aske me to dig out there existing black plastic edge and just use a natural edge with the grass. If you were set on keeping the black plastic I would see if you could get it to blend better by grading the outside of the edge with loam to get it to look more even.