Follow this easy step by step tutorial on how and when to divide Hostas so you can be sure they will thrive in their new location.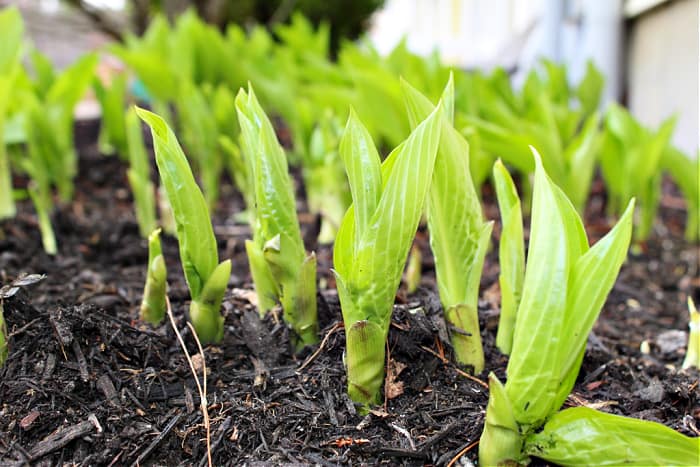
Although dividing Hosta is not usually necessary, it has many advantages. Dividing Hostas helps prevent overcrowding, and improves the overall health of your Hostas and surrounding plants. My personal favorite reason for dividing these perennials is you get free plants!
When to Divide Hostas
Early spring and fall are the best times to divide Hosta, but these perennials are so resilient they can be divided anytime throughout the growing season as long as they receive adequate water.
I prefer to divide in early spring right before they unfurl (right before the leaves open up from their curled up state). This allows you to see where the plant is and where you have to dig, but at the same time the leaves aren’t big enough to be in the way.
Also, dividing perennials in spring lets you use spring rains to your advantage and allows the plant plenty of time to get established before the heat of summer, or freezing cold of winter.
How to Divide Hostas
In the steps below I’m dividing a gigantic Hosta in the front of my property. Normally I would dig up the entire plant, but since this is so large I’m actually slicing through the middle of the plant while it’s still in the ground, and only digging up half. This is usually necessary for really large plants.
1. Dig Around the Base
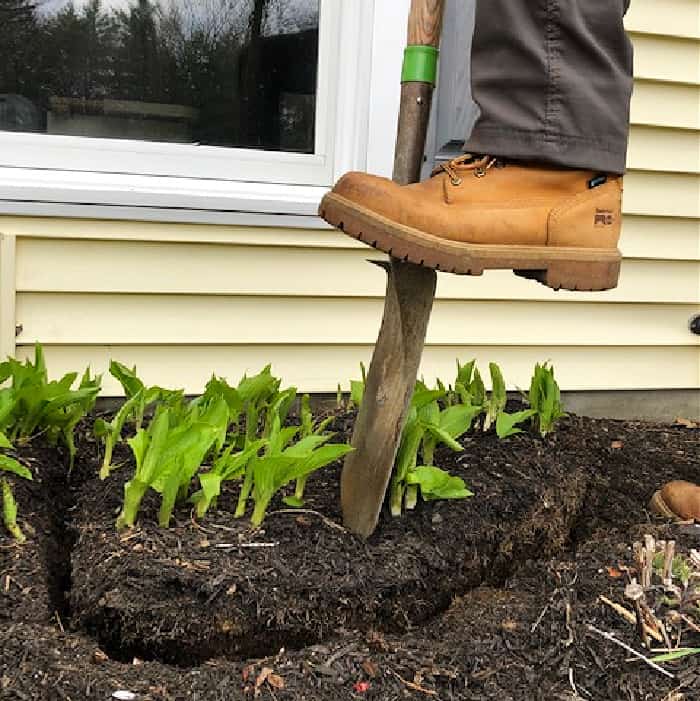
Use a flat edging shovel like I have or even better, use a transplanting shovel to dig around the base of the area you are looking to dig out. In this example I’m only digging out half the plant so I sliced through the middle of the plant in between the foliage that’s starting to unfurl.
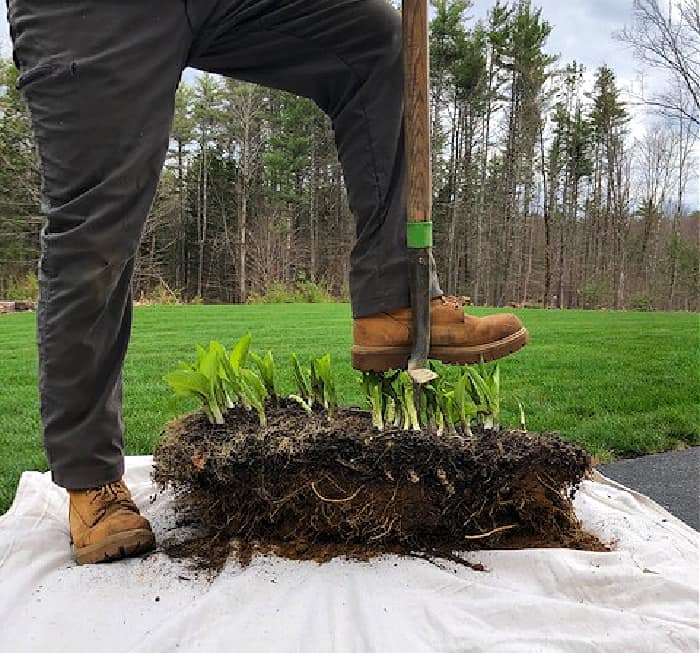
To stay in control place the shovel where you want to dig in, and then use your foot to press down on the shovel. Your body weight is doing the work. Don’t throw your arms, or stab at the area.
You don’t have to go too deep at this point. The main goal of this first pass is to break through the top of the ground and get a shape of the area you are digging out.
2. Dig Deeper and Pull Up
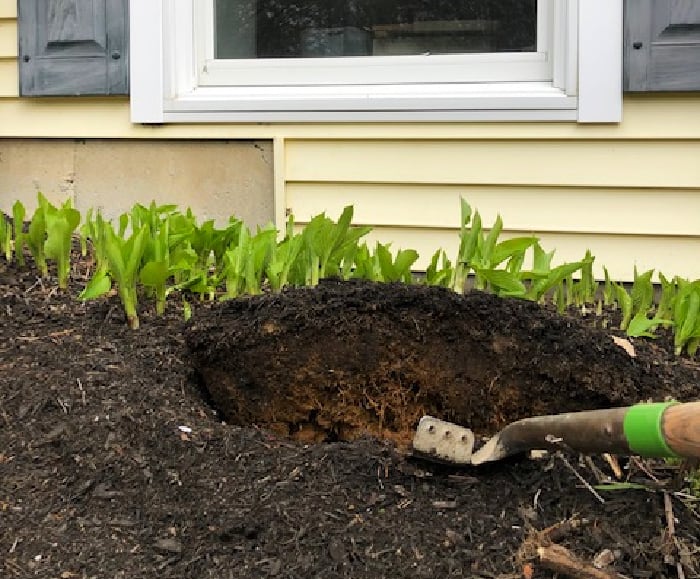
Again, with the edging shovel, go around the same area you just dug into at least one more time. For every lap around the plant you make, you’ll be able to dig a little deeper. Eventually you’ll be deep enough where you can start to use more of a prying action to push the clump out of the ground (as seen below).
3. Shake Off Dirt
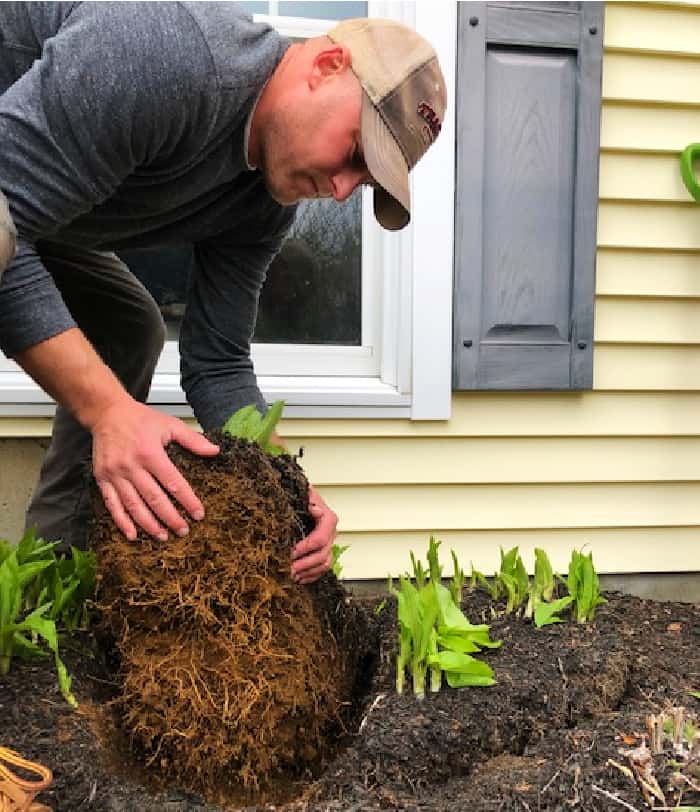
Once you get the clump free from the ground, gently lift it up, barely off the ground, and drop it a couple of times to shake off as much dirt as possible (see below). This will make it easier to handle and minimize the amount of dirt that will need to be replaced.
4. Put Clump Onto Tarp Or Flat Area
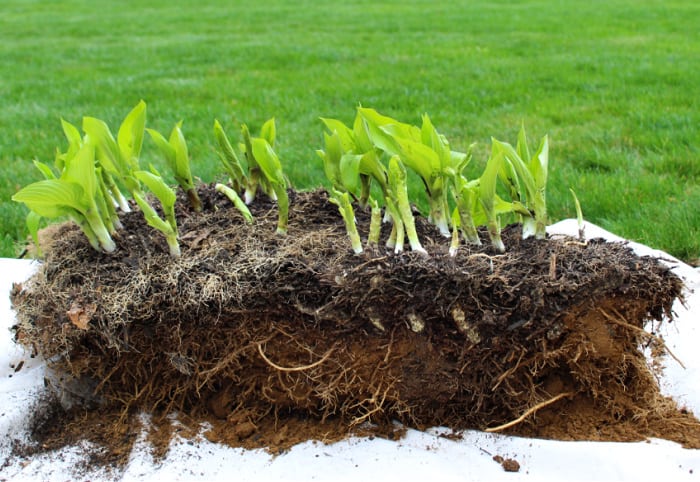
Once you feel you have removed most of the loose dirt, put the clump onto a tarp or blanket. I like to place on a blanket on top of a hardscape surface. This clump below is on top of a painters blanket on the side of my driveway.
5. Use Shovel to Cut Into Sections
From here, use the shovel to cut the clump into smaller sections. I try to find areas of the clump that are naturally divided. The idea is to prevent slicing through the eyes or leaf portions if possible. I find this part to be much easier on a hardscape surface. You can control your cut better and won’t need as much force.
I divided this clump into three sections (see below)…
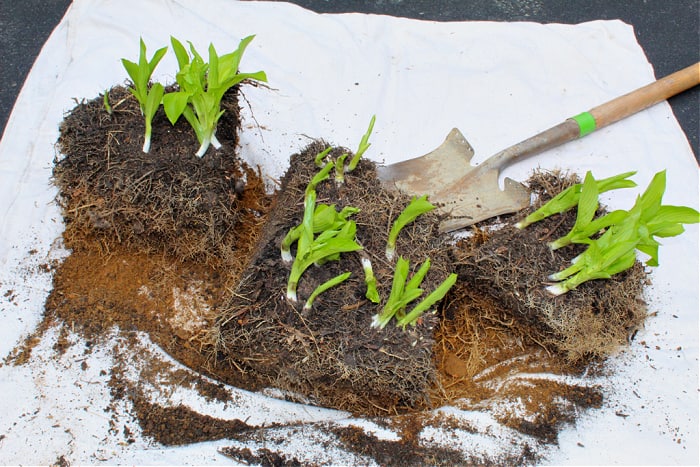
90% of the time, this is where I would take the three clumps above and simply plant them wherever I intended too. I really prefer this kind of dividing where you’re taking larger chunks of the plant with multiple eyes per section.
These clumps are resilient and less likely to dry out. They have more roots and will be easier to establish. Also, if a few eyes within these sections fail, it doesn’t matter since other parts can still get established.
6. Optional, Rinse Off Roots and Cut With Knife
If you’re looking to get more divisions, then you will need to go a little further then the last step. After establishing the 3 clumps like we did in step 5, you’ll have to prepare the clumps to be divided again.
This time more precision is required since you are dealing with smaller clumps. A long knife is a better tool for this job. Any long, sharp knife will work but it’s best if you can get a garden knife.
But before dividing again, I recommend rinsing off as much dirt as possible. I like to fill a wheelbarrow with water and bob the plant up and down like I’m creating a wave pool. This knocks away a lot of the dirt tangled up in the roots and will make it much easier to cut and be precise with the knife.
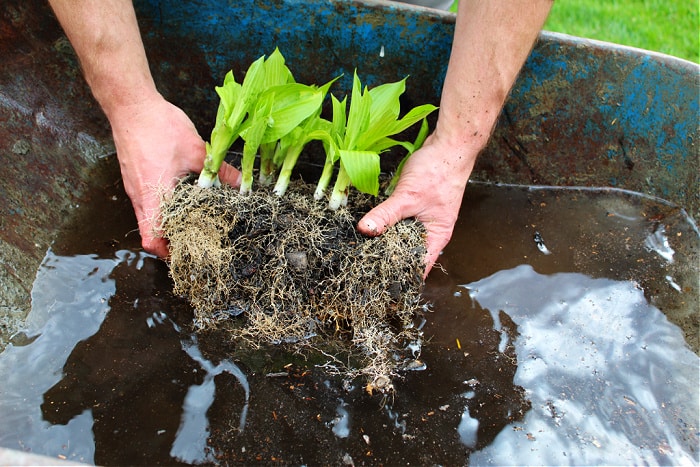
Once clean (or cleaner) use the knife, or your hands to separate sections.
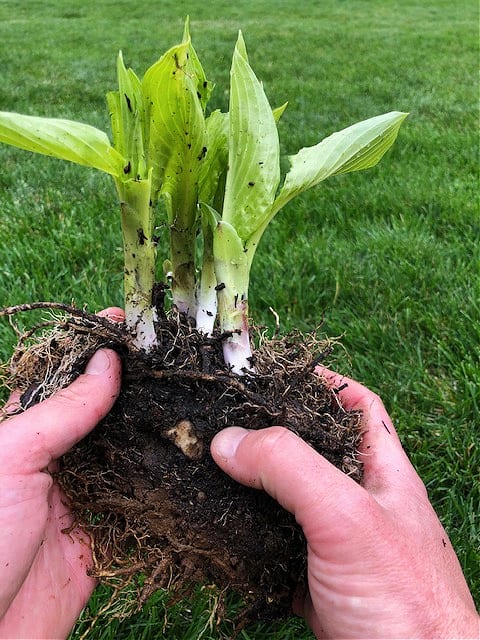
Hostas have a clumping root system. You should be able to use your knife and hands to separate these clumps and slowly pull them apart. There might be some tangling of the roots but as you separate clumps the roots will become untangled. Don’t worry if some of the clumps get compromised.
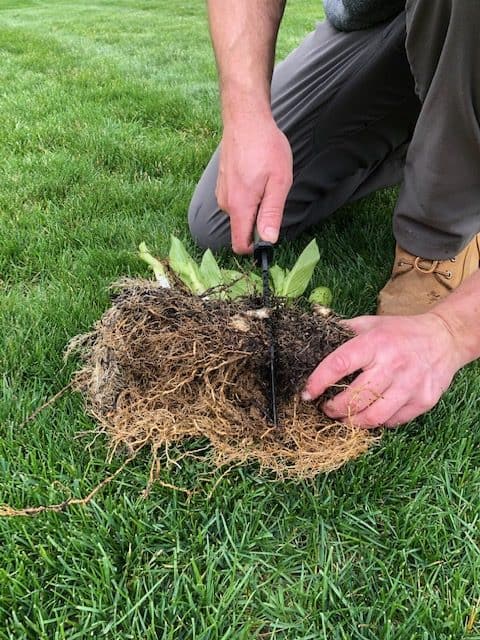
This is what one of the divisions looks like:
7. Transplant
Once you have your new divisions, it’s time to transplant them in their new location. Make sure you dig a hole plenty wide enough so you can spread the roots out. Don’t plant too deep. You should see a soil mark from where they were previously planted. Don’t bury deeper than this mark.
Incorporate compost into the existing soil and use your hands to pat down the soil around the Hosta so you get good soil to root contact.
8. Keep Watered
As with all transplants, keep your Hostas watered until established. Continue to monitor their health especially as you begin to back off on watering.
Check Out These Posts Next
How to Install Landscape Fabric
Follow Me
Join my free email list!
Plus, follow me on Facebook, Instagram, and Pinterest.


I have over 25 varieties of Hosta in my yard and absolutely love them. I use a similar approach to you cutting them with a knife. I like to get as many divisions as possible to get even more free plants!
25 sure is a lot, that’s so cool! It’s crazy how many different colors and textures there are, and division is such a great way to get free plants!
Can you mix hostas when re planting
Thank you
Yes you can. Just make sure you give them enough spacing in between each plant to prevent overcrowding.
Can you over water hostas. Or. Under water them. I simply love them but never have much luck with them 🥴
What exactly are you seeing happen? Do the leaves turn yellow, or brown? Does the discolor start at the tip? Hostas are pretty tough once established so it’s probably unlikely you are over watering. If anything they could be in too much sun. Let me know what exactly you’re seeing and I’ll be happy to help!
Hi I have several hostas that I need to separate and I’m wondering if I have to dig up the entire plant in order to separate them? Can I just take a shovel and cut and dig up the parts that I want to relocate? Can someone please give me some advice on that. Thank you
Hi Joe. Yes you should be fine to just take a section out instead of digging up the entire plant. I would use an edging shovel to slice down into the ground and divide the plant into the section you want to keep in the ground and the section you want to dig up for transplanting. Just work carefully around the section that is staying in the ground so you disturb it as little as possible.
Thank you very much. I’ll be chopping up my hostas this weekend…..lol
Hi Mark,
I have to say your instructions for dividing hostas are spot on! I had two very large hostas in a bed in a side yard of my house which were divisions given to me by my brother about 20 plus years ago. As you can imagine they had gotten quite large over the years and were in a location that was too sunny. By the end of the summer they would be burned to a crisp.
About two years ago I had some yard work done and the landscaper split those two plants in half and transplanted five large divisions into a new bed in a shadier place. They have done very well in their new home. Last month I decided it was time to dig up and divide the remaining two plants and put the divisions into another new bed under a maple tree on my front lawn. Since we had a lot of rain in March, the ground was soft, and with very mild temperatures they started to sprout. I followed your instructions and although it was a pretty labor intensive project for a 75 year old woman, I managed to split out 16 new, fairly large plants. I’m thrilled with the results! Spring in North Carolina is the best time to do a project like this as once the rain stops, the ground turns to cement.
Thanks again for your step by step instructions. I will be sure to refer to your tips for future projects I may have for my yard.
Thanks so much for the great comments Linda! Sounds like you did a great job with it, success!!!