
Using this method you can easily pot up hundreds of plants a day right in your backyard.
Potting up plants is one of the major jobs you will have in your back yard nursery. It is important to have an efficient way to pot up and label your plants.
But before you get to potting up your plants using the steps below, it is extremely important to have a solid potting mix.
Potting Up and Labeling Plants
Potting up your plants is really simple. But if you are potting up a lot of plants it is important to be efficient. Especially if you are trying to start a profitable plant growing business.
Since I pot up several thousand plants in just a couple of days I like to recruit a couple of neighborhood kids so we can form a sort of assembly line.
I’m a big fan of nextdoor.com for finding some local help. It is pretty much a super localized version of craigslist. It’s amazing how efficient you get when you nail down a simple process. The simple 8 step process below allows me and a couple of helpers to pot up $30,000 worth of plants in just a couple of days.
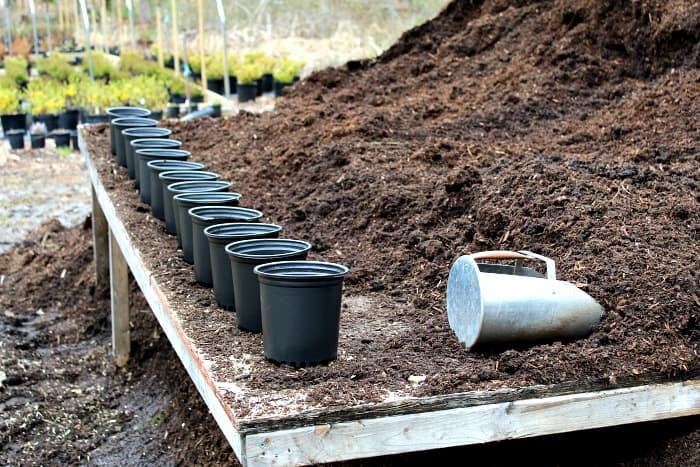
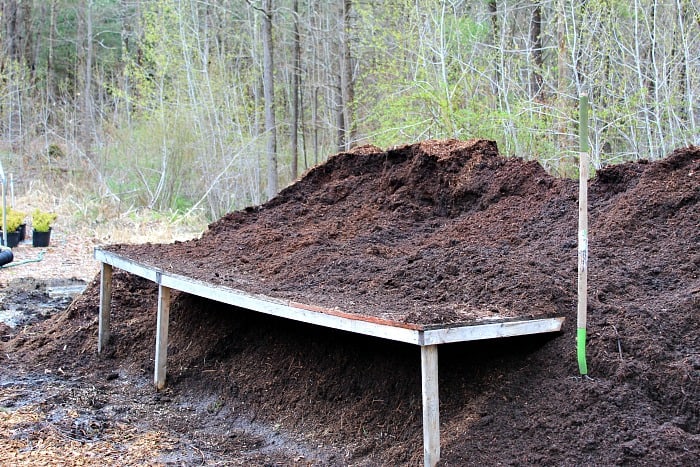
Step 1 Set Up Potting Bench
Don’t get crazy building anything fancy here. Look at the pic below. All I did was build a simple frame with 2×4’s and screwed down a sheet of plywood on top that I cut about 3 feet deep.
After that just add a couple of 2×4 legs to the front. Notice how the back of the bench doesn’t even have legs! Simply let your bench rest on your potting mix pile. This allows you to have easy access to the potting mix as you pot.
Don’t worry about making it straight, you want to be able to just stick it into the pile.
Step 2 Spread Out Containers
The key to forming an assembly line is to stick to one task at a time. So layout a bunch of containers over your bench instead of potting one container at a time.
I get most of my pots from Greenhouse Megastore.
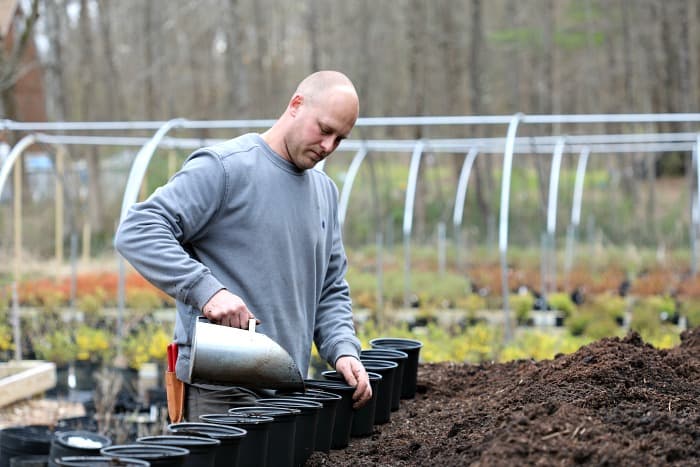
Step 3 Fill Pots With Potting Mix
If potting up plants with potting mix attached…
Fill all your pots nearly to the top. I strongly recommend investing in a good galvanized feed scoop like the one I use in the picture below.
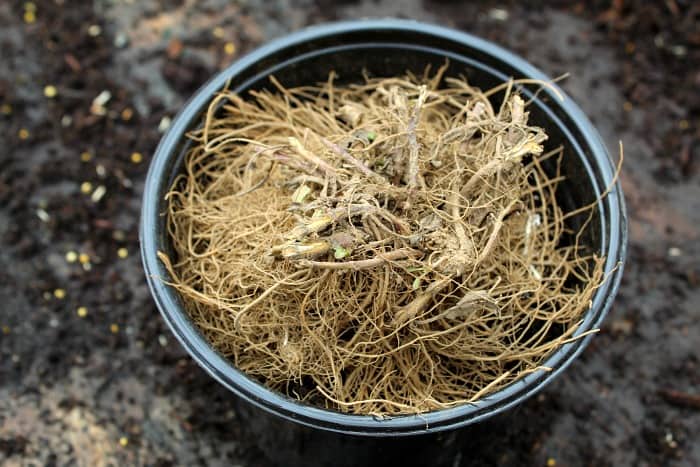
If potting up a bare root plant…
You will have to determine how high to fill your pot depending on the size of the roots of the plant. If you have a plant with very long roots you will not be putting in a lot of potting mix at this point. Just make sure you have at least some potting mix at the bottom of the pot.
Step 4 Put Plant In Pot
Time to place your plant into the pot. Start off by placing the plants on top of your potting mix that you just put in your pot.

Once again you have to treat potting up a plant with potting mix on the roots differently then potting up a bare root plant.
If potting up plant with potting mix attached…
After filling the pots in step 3 and laying out your plants, simply make a little void in the potting mix with your hand.
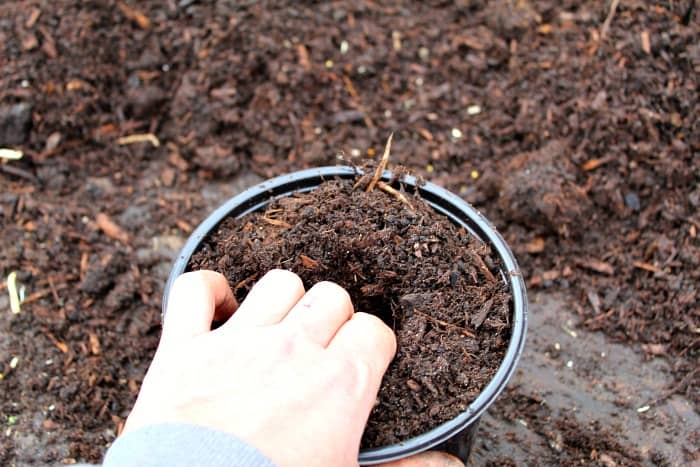
After that simply put the plant into the potting mix so that top part of the potting mix of the plant is just about level with the potting mix in the pot.

Be careful not to bury plant too deep. This could cause the plant to rot.
Finally, Tamp down.
If potting up A bare root plant…
Start by giving the ends of the roots a small trim. Don’t cut them to aggressively as this could kill a plant that is coming out of dormancy. If a plant is completely dormant then significant root pruning is usually OK.
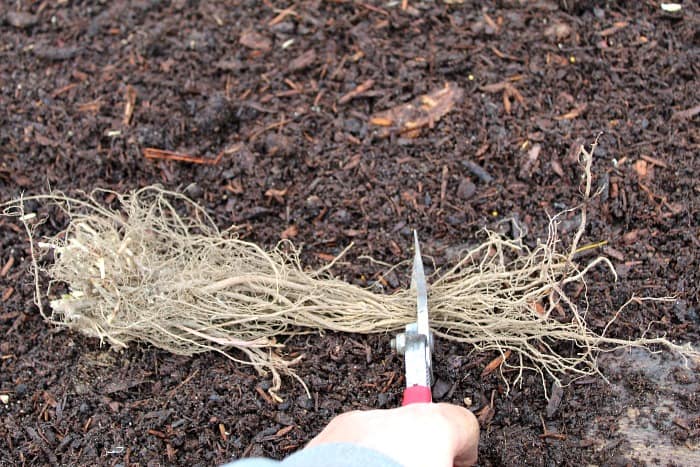
Next, Take your plant and spread the root system out as much as possible so it fans around the potting mix creating a circle.
This is important! If you bunch all the roots together and bury them too deep you will likely suffocate the plant!
After you have the root system of your bare root plant spread across the potting mix of your container, carefully add potting mix around the roots making sure there are no voids. Tamp down to remove any air pockets.
Step 5 Label Your Plants
Labeling is an absolute requirement when growing plants. Every plant needs a label!
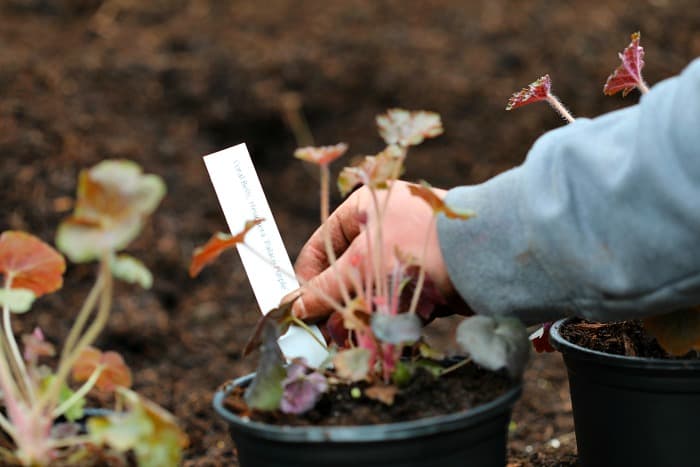
I buy my blank labels at gardenware.com. They mail you your order of blank plant labels and they email you a template that you download on your computer and you can customize your own labels.
I keep it pretty simple and just add the botanical name as well as the common name, but you can get into greater detail such as sunlight requirements, bloom period, height/spacing, etc.
I usually like to leave these details to bench cards which I use during sale events.
Once you are happy with the plant labels you created it is time to print.
For this you will need a laser printer or thermal printer. Inkjet printers don’t work because the ink on the labels will fade when they are in the weather.
Unlike inkjet printers Laser printers and thermal printers ink can get wet and will last several seasons with minimal fading.
The only problem with laser printers is that when printing heavy weight labels they can be a little finicky. They jam a lot, and can overheat.
Thermal printers are by far the best and that’s what most professional growers use. The problem is they are much more expensive as opposed to laser printers. We’re talking about $900 vs $100.
I would recommend starting with a laser printer if you are starting out small and willing to use a little bit more patience in your printing. Eventually, you will want to upgrade as you grow.
A great place to get a thermal printer is at United Label.
If you don’t have money to invest in a thermal printer or laser printer and you don’t have a ton of labeling to do you can simply buy a garden marker specifically for plant labels.
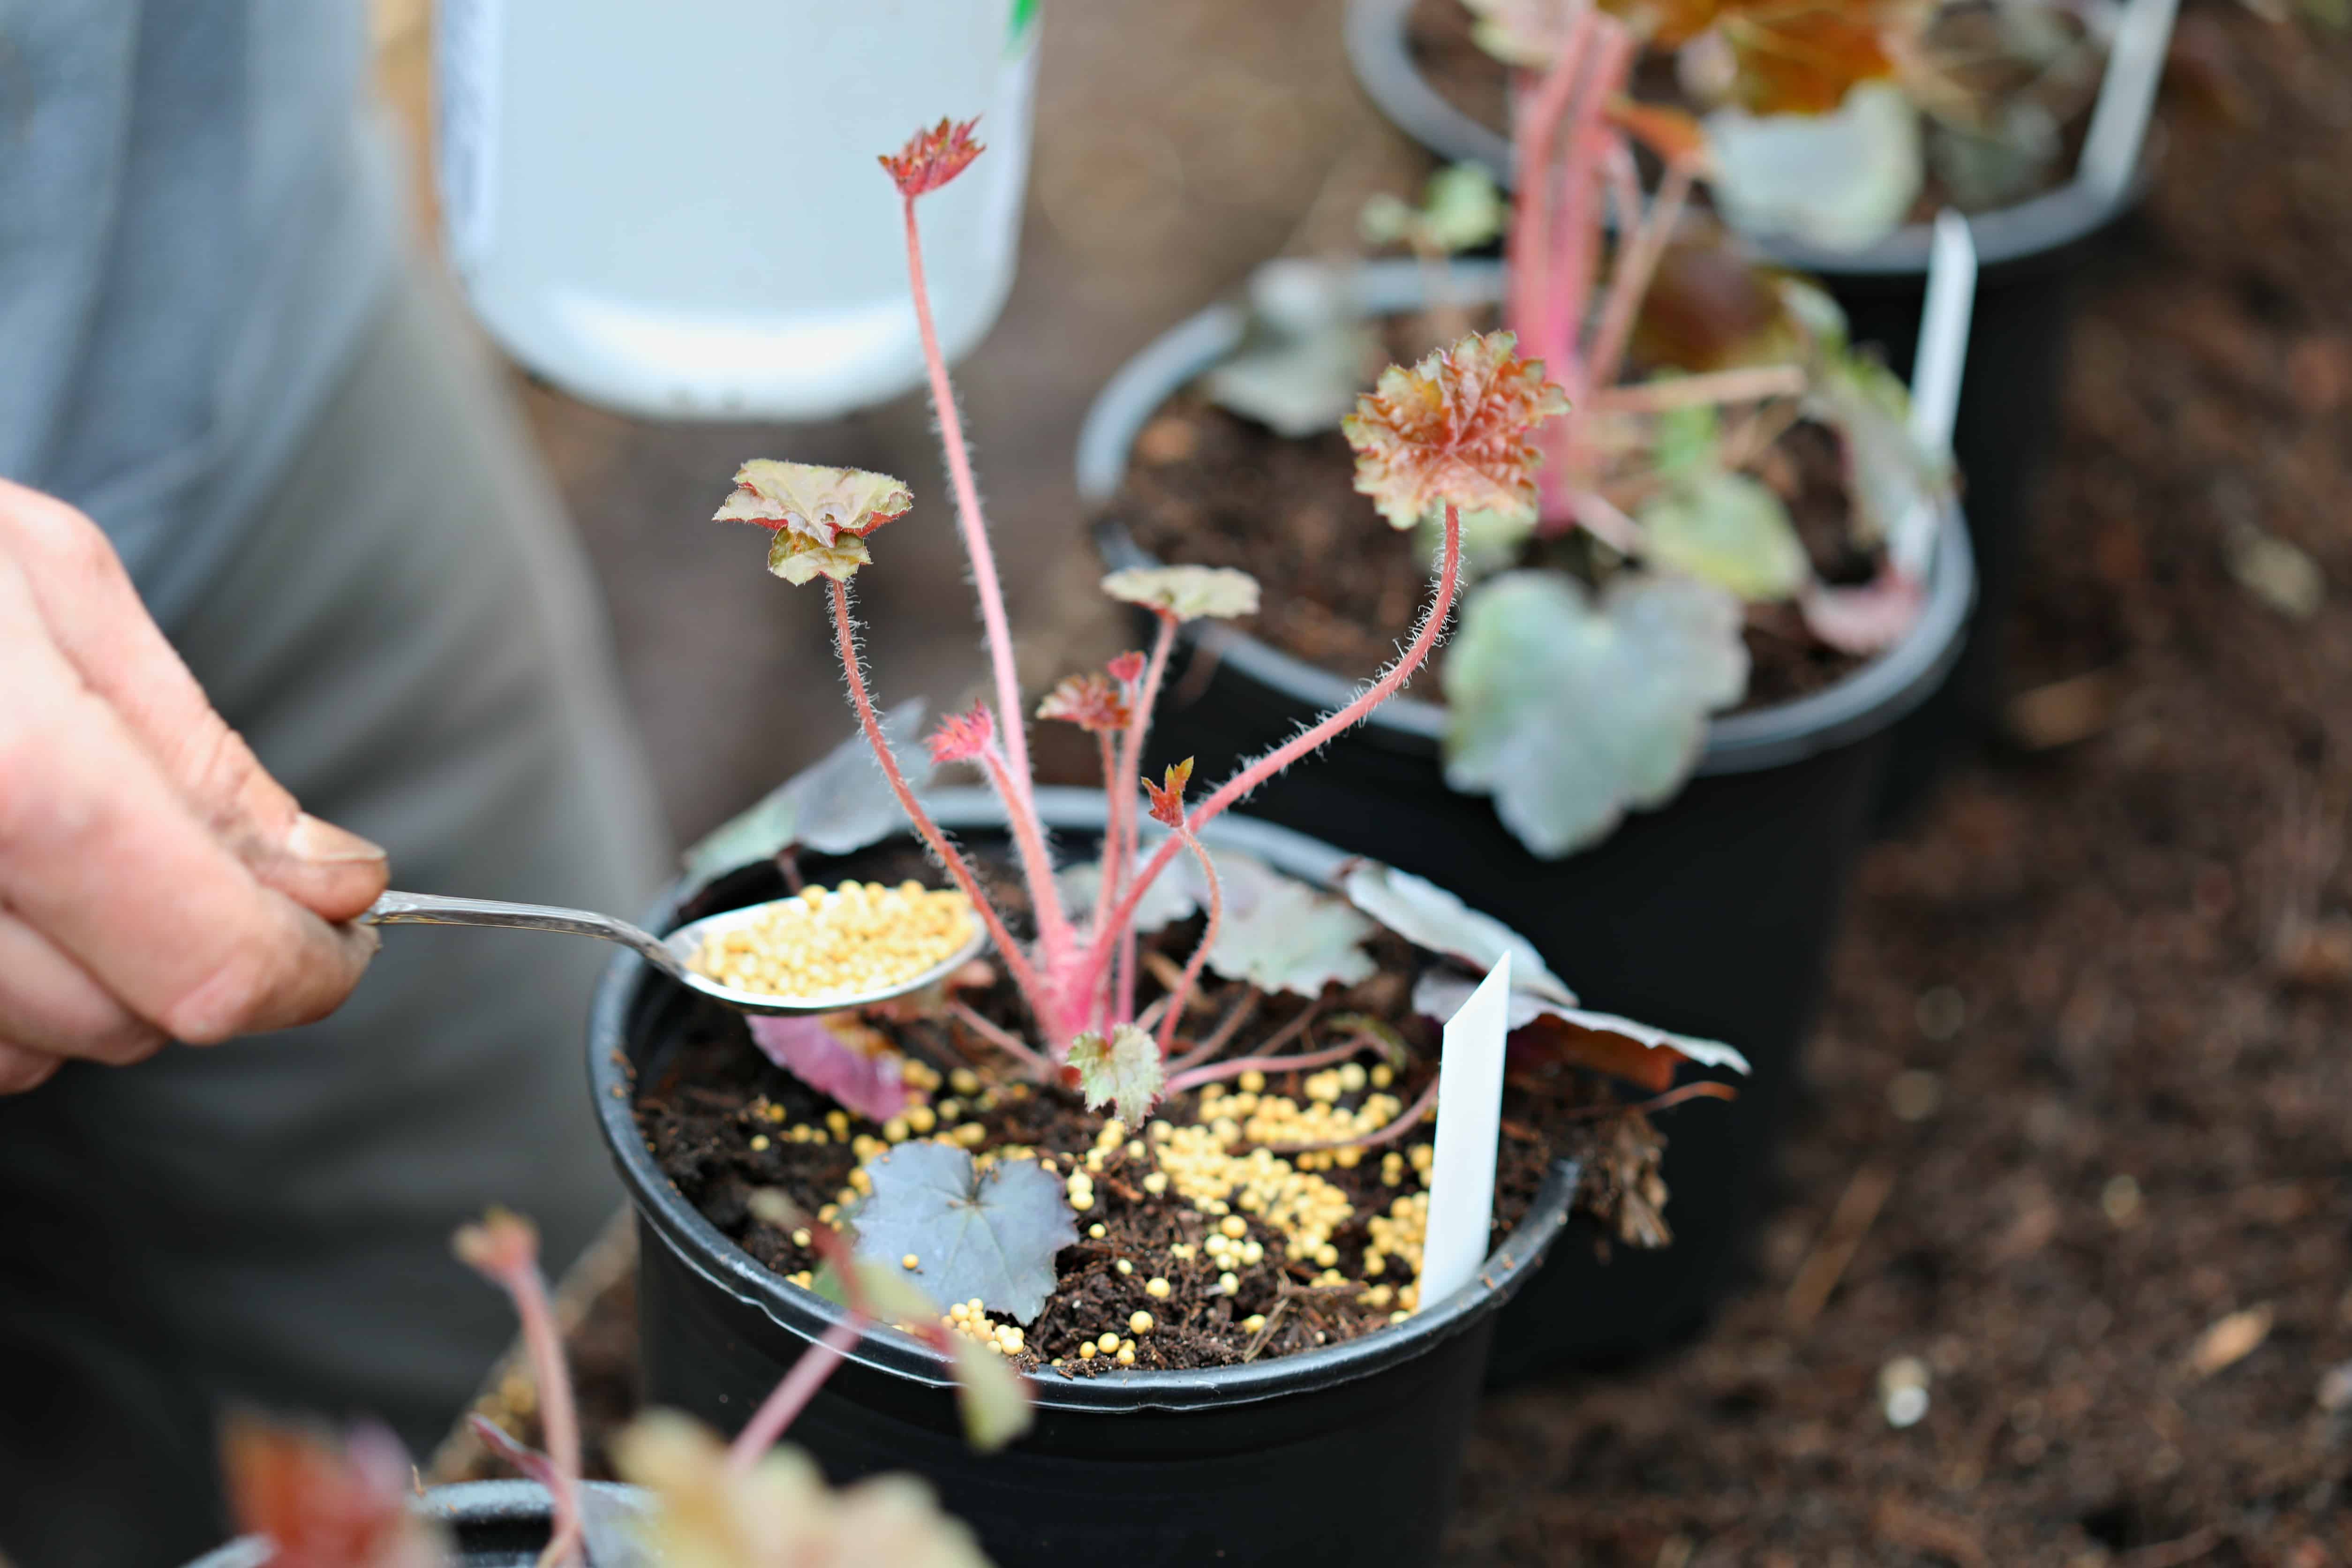
Step 6 Tablespoon of Osmocote
For 1 gallon plants I like to add 1 tablespoon of Osmocote (14-14-14) around the top of the potting mix. For 3 gallon plants I use 3 tablespoons. 1 tablespoon per gallon is a pretty reliable formula.
Osmocote is a very slow release fertilizer that will last several months. I only fertilize plants once while potting up and then once in the beginning of each season that follows.
Step 7 Put Plants Into Growing Area
This is where it helps to have a large wagon or cart. Try to setup this whole operation so your potting area is close to where you’ll be leaving your plants.
Also make sure you leave paths in your growing area so you can access each plant for maintenance purposes while it is growing.
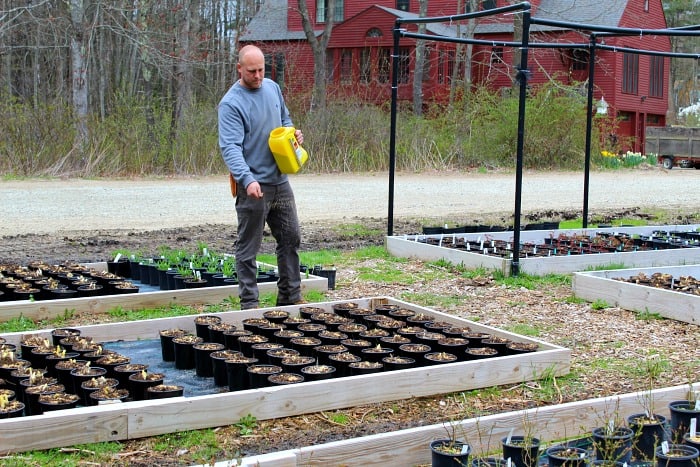
Step 8 Apply Preen
I really try not to use a lot of chemicals when growing plants, but Preen is something that I do think is worth it. It is fairly inexpensive and it definitely helps in preventing weeds. I apply Preen twice a season.
I would recommend using a handheld broadcast spreader but to tell you the truth I usually just walk down my plant rows and grab handfuls straight out of the bucket and manually flinging the Preen into the plants.
Getting all your plants potted up is a huge accomplishment, but your responsibilities certainly aren’t over. It is now time to test your nurturing side. You are now responsible for hundreds, if not thousands of plants.
It is important you know how to care for your plants and monitor conditions in your back yard nursery.
Be sure to check out my 3 favorite plant growing methods to grow your plant inventory!
Check Out These Posts Next
Follow Me
Join my free email list!
My aunt needs to pot some of her plants so that they will grow and it will be really pretty for her and allow all of the pots to be separate. Getting some help from a professional to be more efficient at potting could be really useful and allow her to be more efficient. I liked what you said about how doing one task at a time can be really useful for setting up an assembly line.