
Learn How to Fertilize Your Lawn like the pros do, using these easy to follow tips.
Fertilizing your lawn yourself has many benefits. By managing your own lawn you can observe it daily instead of weekly like the pros would. This means you can intervene early if your lawn needs a feeding, or if there’s threats from fungus, pests, or weeds. You can also work around the weather and choose to apply product when conditions are best.
Don’t be intimidated by the idea of fertilizing your own lawn. Follow these tips to keep things simple and be on the way to your best lawn yet.
1. Measure Square Footage of Lawn
You’d be shocked at how many people think they know the square footage of their lawn but they are actually way off. You could be drastically underfeeding, or overfeeding your lawn which are two of the biggest ways you can have failures in the lawn. Even if you think you’re sure of your lawns square footage double check it. In fact, you don’t even have to get out of your chair. Simply follow these instructions and you can check your lawns square footage online, for free: Square Footage of Your Lawn.
2. Purchase A Good Spreader
This is such an important step. You don’t need to purchase an expensive spreader, but you really don’t want the cheapest. Scotts Edgeguard Deluxe is one of the most sold spreaders out there and honestly there are problems with it. The spray pattern is inconsistent and a lot of times you’ll get stripes of green from where the fertilizer bounced off the wheels and collected. This isn’t meant to bash Scott’s, in fact their Scotts Elite which is the next step up is an excellent spreader that is a great choice for do it yourselfers.
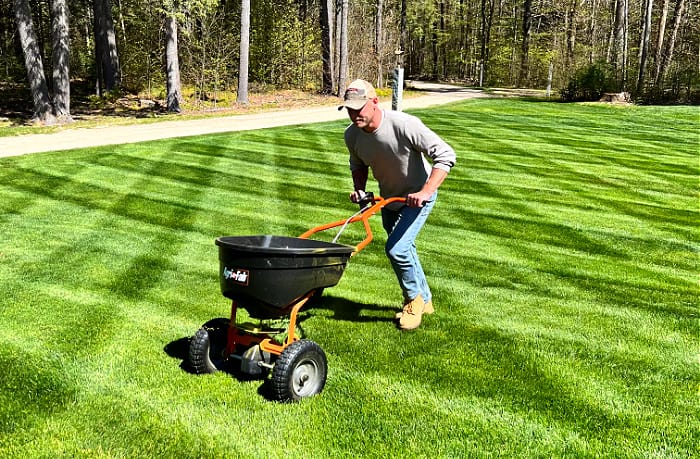
Have a smaller yard and don’t need a walk behind broadcast spreader? Check out this easy to use handheld rotary spreader. This is a great option if you have 5,000 s/f or less of grass.
3. Find a Solid Lawn Care Program
Knowing what products to apply and when can be challenging. A lot of people resort to the generic 4 step programs in the big box stores that rely mostly on synthetic fertilizers. For a more superior lawn program that uses slower release fertilizers, superior weed control prevention and treatment strategies, and shows you how to use soil temps instead of calendar dates to apply product, check out one of these two schedules below:
Lawn Care Program For Cool Season Lawns
Lawn Care Program For Warm Season Lawns

4. Figure Application Rates
So you know what product you want to apply to your lawn, now how much do you apply? This is really what separates the pros from the homeowners. Most homeowners would simply look at a bag of fertilizer to see how much square footage the bag covers and call it good.
For example a 37.5 lb bag of Scotts Turf Builder 32-0-4 says it covers up to 15,000 square feet. If you know your square footage of your lawn you can pretty simply calculate how many bags, or how much of one bag (for small lawns) you need to apply. You can use this strategy if you want to keep things simple, but it’s not the best way because you’re not getting a full understanding of how much N,P,K you’re applying. N, P, K, stands for Nitrogen, Phosphorus, and Potassium. These are your typical macro nutrients that you feed your lawn and it represents the 3 numbers you see on the fertilizer label, in this case Scott’s Turf Builder for example is (32-0-4), meaning the bag contains 32% nitrogen, 0% phosphorus, and 4% potassium.
Let’s just say you bought this bag that says it covers 15,000 s/f, and your lawn happens to be 15,000 s/f. You know that you can just apply one bag to your lawn and you’ll satisfy the label requirement. But can you answer this question: How much nitrogen did you just apply to your lawn? If you can’t then you need to start thinking like the pros.
Let’s use nitrogen as an example since most of the time (but not always), nitrogen is the nutrient that will be the main focus of your lawn program. Generally you want to apply 1 pound of nitrogen per 1000 square feet of grass. (Again, we are speaking in generalities for math purposes. There’s plenty of times you want less nitrogen).
So when you’re looking at all these different fertilizers at the store and you see a label that says 32-0-4 for example, that label is telling you there is 32% nitrogen, 0% phosphorus, and 4% potassium in that bag of fertilizer. So the only question you need to ask yourself is…
“How much of this stuff do I put down, to get me 1 pound of nitrogen per 1000 square feet?”
This sounds complicated, but things will be clearer after looking at some examples.
Let’s use a balanced fertilizer with numbers 10-10-10 as an example. That means that bag of fertilizer contains 10% Nitrogen, 10% Phosphorus, and 10% Potassium.
It comes down to this simple equation:

We know that our preferred pounds of nitrogen per 1000 square feet is 1. You can choose to use .75 or even .5 for example if you want to apply less nitrogen, but 1 is pretty standard so let’s use that for now.
We know that the numbers 10-10-10 are referring to percentages, therefor this bag contains 10% nitrogen (nitrogen is the first number).
In this case the numbers look like this:
1 pound / .10 = 10
In this example we need to put down 10 pounds of product per 1000 square feet and that satisfies our 1 pound of nitrogen per 1000 square foot rule.
Let’s look at another example: In this case let’s take a bag that is made up of 15-6-0. This means there is 15% nitrogen.
Again, we know that our preference is 1 pound of nitrogen per 1000 square feet. So using the equation from above we take 1 pound and divide that by the percent of nitrogen in the bag. In this case the percent of nitrogen is 15%:
1/.15= 6.6
You need to apply 6.6 pounds of this product per 1000 square feet. Make it simple and just call it 6 pounds.
5. Pour Fertilizer Into Spreader
Using the example above, all you really know at this point is that you need to apply 6 pounds of product for every 1000 square feet, so now what?
Don’t worry, this part is simple. Once again, let’s look at an example:
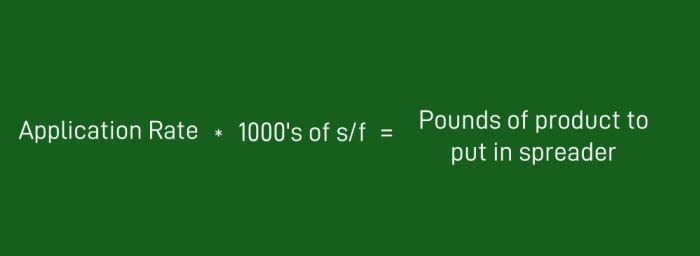
If your lawn is 5000 square feet, and you need to apply 6 pounds of product per 1000 square feet, then you need to apply 30 pounds of product (6 pounds * 5) total to your lawn. The formula looks like this:
In the example above:
6 pounds * 5 = 30 pounds
If you have a 40 pound bag of fertilizer for example, simply pour 3/4 of the bag into the spreader and this will be 30 pounds.
At this point we now know how much product is going to be distributed over the lawn.
The only question you should be asking yourself now is “How do I apply 30 pounds of fertilizer as evenly as possible.”
That’s it, still no mention of spreader settings. Just 30 pounds of fertilizer needs to go into your spreader. Of course you don’t have to put the full 30 lbs. in all at once. You can simply divide your lawn up into sections and pour the necessary amount of fertilizer into the spreader. For example in this case you can put 15lbs in the spreader and apply it to half your lawn, then you can pour the remaining 15lbs into the spreader and apply it to the other half.
6. Set Spreader and Apply
The key to an even fertilizer application is to learn your spreader by lowering spreader settings and dividing your lawn into sections.
Using our example above we know we need to apply 30 pounds of fertilizer to our 5000 square foot lawn.
Of the total 5000 square feet, 2500 is in the front yard and the other 2500 is in the backyard.
Instead of putting the full 30 pounds in the spreader and doing the whole lawn at once, put half in and set a low spreader setting, maybe around (2- 2.5) depending on the spreader you’re using.
With 15 pounds in the spreader, walk the back lawn making straight passes. Go straight down in one direction and then turn and go in the opposite direction. You want to overlap so that the fertilizer is being broadcasted over the wheel marks from your last pass.
After completing one pass of the entire back yard, check inside the spreader. How much fertilizer is left?
This is when you have to use your judgement and start making adjustments.
If barely any fertilizer was used, turn the dial up a little bit to a higher setting before going over the back lawn again. If you think it’s coming out too fast then lower the dial.
When you go over the back lawn for the second time go perpendicular to the first pass.
Once finished going over the back lawn the second time, assess how much fertilizer is left again.
Continue making adjustments and alternating fertilizer patterns until you are out of material.
Repeat this process for the front lawn.
Eventually you will get a feel for your spreader, and get to know your property. The goal is to eventually learn your settings so that you only need to apply twice in a perpendicular pattern. Keep a log of what you need to set the dial to for every type of fertilizer you use since different fertilizers have different sized material.
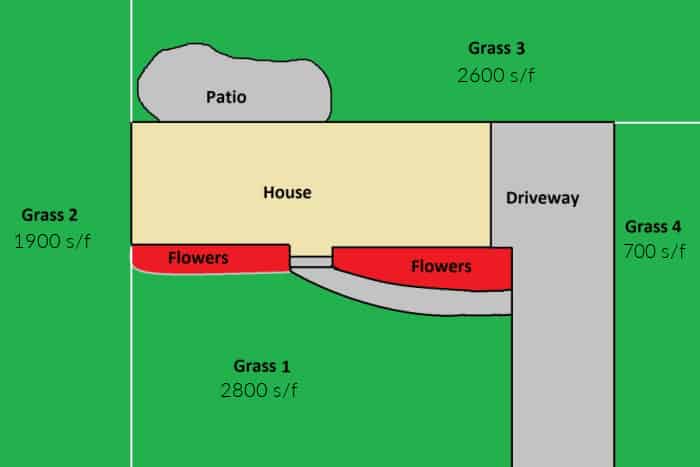
Lastly, don’t be afraid to break your lawn up into several sections, especially if you have natural or man made features that break up your lawn. The smaller the better when trying to learn your spreader settings. Look at this rough sketch below of how someone broke down the square footage of their 8000 s/f of grass. In this example, Grass section 4 would be a great place to calibrate your spreader settings:
7. Water In
If you have an irrigation system then turn it on after applying granular fertilizer. Water each zone thoroughly to activate the fertilizer and get it into your lawn. If you do not have an irrigation system then always try and time your applications when there is rain (not heavy) in the forecast. If you’re using more natural types of fertilizers then immediate watering is not as necessary but it’s still beneficial. If you sprayed weeds with a liquid post emergent herbicide at the same time as fertilizing then don’t water your lawn until the next day.
8. Clean Your Spreader
Don’t forget to hose down your spreader after every use! Some fertilizers can get very sticky and build up in all the small moving parts of your spreader. Keeping it clean will ensure you continue to get an even application with every use.
Best Conditions to Fertilize Your Lawn
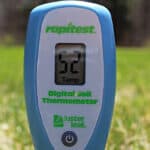
1. Wait until your soil temps are warm enough in early spring before starting your lawn care program. Fertilizer and pre emergent herbicides work best once the soil temperature reaches 50 degrees. Don’t waste your time or money by applying too early.
To find average soil temps based on your specific location check out Green Cast Online.
2. Fertilize your lawn when there is a light rain expected. Since most fertilizers needs to be watered in to be effective, wait until the forecast calls for a light rain if you do not have an irrigation system. Just be sure to avoid heavy rains that will cause the fertilizer to run off.
3. Avoid applying fertilizer during the heat of the day, hot spells, or periods of drought. This could cause your lawn to burn. Instead, apply in the morning or late afternoon and when you aren’t experiencing extreme weather conditions.
Check Out These Posts Next


Follow Me
Join my free email list!
That’s good to know that it would be possible to put too much fertilizer on your lawn. I want to put fertilizer on my lawn, but I feel like I would probably put too much or too little on it. It might be a good idea to get someone who knows what they are doing to help me.
Hi Tyler, If you want to play it safe then stick to an organic fertilizer such as milorganite. It’s really hard to over apply organic fertilizers since they work by slowly decomposing. Synthetic fertilizers on the other hand can burn your lawn if over applied.
It’s good to know that fertilizing your lawn is good when light rain is expected. My husband and I just recently moved into a new home a couple of weeks ago that has a pretty large front yard, and we want to look into getting some fertilizer to help with keeping it green. We’ll make sure to keep this information in mind once we find some to get for our lawn!
congrats on the new home! let me know if you have any fertilizer questions
I like that you mentioned you need to wait until your soil temperature are warm enough to start fertilizing your lawn. My husband and I moved to our new house, and we are looking for advice to keep our garden in good shape. I will let him know about your recommendations for fertilizing our lawn properly.
Your detailed information comes in handy. I start doing the garden last month so your tips can help you know the way to fertilize my lawn.
Wow, I haven’t considered that my walking speed can actually affect how much of fertilizer I spread on my lawn. No wonder sometimes I feel like my lawn looks better when it’s my husband’s turn to spread the lawn. I will definitely look into method 2 like you suggested so that I can achieve similar effects on my lawn no matter who is doing the spreading. I would think that buying a spreader with more settings for a wide variety of fertilizers on the market can be a good choice as well.
I like what you said about using fertilizer on your lawn when the soil reaches 55 degrees. My sister wants to make sure that her lawn is healthy in the coming months. I’ll share this information with her so that she can look into her options for professionals who can help her with fertilizing.
Thanks for explaining that fertilizers shouldn’t be applied during the heat of the day since it will burn off and not be as effective. My brother is looking into having a dolomite fertilizer applied since he’s developing a farm with his wife on rural land they just purchased. I’ll pass along these tips so he can work with the soil conditioning service to make sure the fertilizer is applied at an ideal time!
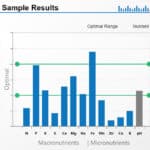
I’ve been looking for this exact information forever! Thanks so much for this post. I also would like to suggest to beginners to properly get your soil tested. I use a garden center whom has a an expert available; I drop off my samples she picks them up test them and returns the analysis with proper recommendations for application amounts of proper nutrients and micro nutrients for my submitted square footage. What I also learned was patience! I liked your education on the spreader applications, sounds great. I am working towards maintaining my healthy lawn with organic methods, Thanks again for your informative post.
You’re very welcome Valerie! I’m really happy you found this helpful. I totally agree, soil testing is always a great idea and patience is a must. Lawn care is definitely a long game. It can take several seasons to turn your lawn around.
Old wisdom is to wait until the forsythia begin to bloom (2 weeks ago) and then put your pre–emergent down. This runs counter to your 55-degree soil temp over a 5 day period advice. The suggested site you’ve given us for soil temp has my area (Bucks County Pa) still under 45 degrees for the last 5 day average, and yet I have seen as of 2 weeks ago multiple kinds of weeds showing up getting there ‘taking over the lawn’ campaigns up and running. Don’t want to waste the pre-emergent but feel like the evidence is in and mounting – if I wait much longer I’m afraid I’ll miss the window to put the treatment down??? Help.
Hi Fred, you guys actually hit a 5 day average of over 50 degrees a couple of weeks ago so it is definitely go time for you. You’re back down below that now but that is normal, the trigger is when you hit it for the first time. If you’re seeing weeds don’t forget you’re probably seeing perennial lawn weeds that were already in your lawn last year. Pre emergents only block new seeds from emerging. For seed to germinate it does need warmer these warmer soil temps. Lastly, don’t forget pre emergents create a barrier along the top layer of your lawn and it lasts for several months. Don’t worry about being a little early. One of the reasons I recommend putting down 2 pre emergents in spring (about 5 weeks apart) is to create an even longer period of coverage.
Thanks for all of your great information, Mark! All of your advice has been invaluable! My lawn was doing terrible, but you helped me bring it back. Greatly appreciated!
Thanks Mike! Happy to hear you learned a thing or two 👊
Thank you for giving me information on why my fescue grass was laying on ground.
My pleasure Chris!