
Daylilies are a great choice in many landscapes when used correctly. Proper care and maintenance is important to keep daylilies blooming and foliage green.
If you are looking for a perennial that is easy to grow in all kinds of soil, flowers reliably, survives the winter, and doesn’t easily succumb to damage from fungus or pests, then you are looking for a daylily.
It’s my most recommended perennial in my backyard nursery for customers that want a quality plant without having to do much work. It’s also extremely versatile and has many uses in the landscape.
With so many different varieties of daylily, I can’t even begin to recommend a certain kind. There are literally over 80,000 different varieties and it really comes down to personal preference. I can, however, give you some important daylily care and maintenance tips to get the most out of your daylilies and ensure that you are using them correctly in your landscape.
Where to Plant Daylilies In Your Landscape
Even though there are so many great things about daylilies there are some people who strongly dislike them. Whenever I ask a daylily hater why they feel that way it’s always the same answer. “They overtook my garden beds and crowded out my other plants.”
There’s no doubt about it… If you plant a bunch of tall growing daylily varieties throughout your garden beds then your other plants will likely get crowded out. Especially if you don’t thin them out as they grow.
There are 3 ways I plant daylilies to avoid them taking over my landscape:
1. If planting daylilies in a garden bed consider planting smaller, more compact varieties in the front to form a border.
2. Group them together in groups of 3 to 5 and give them space from other plants.
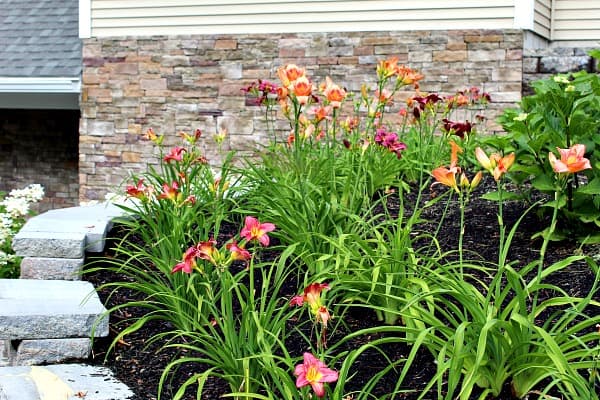
3. Mass plant daylilies along fences, walls, and other areas where you designate the whole bed for daylilies only. Mass planting is actually my favorite use for daylilies.
At my work, on the construction site, we plant them along narrow strips of land along roadways. We also plant them along, and on top of large retaining walls. I like mixing a bunch of varieties together when mass planting daylilies. They all grow into each other and crowd out weeds. This is a great low maintenance solution for areas that normally get neglected.
Environmental Conditions to Consider
Soil: Daylilies do fine adapting to different soils.
Sunlight: Part shade to full sun but will get more blooms in sunnier locations.
Growing Zones: Daylilies thrive in growing zones 3 to 9. If you are in those warmer zones some afternoon shade would be beneficial.
Water: Daylilies are pretty drought tolerant but do best with about an inch of water a week. It is easy to tell if your daylilies need water since you will see the green foliage start to turn brown.
Watering during the hot summer months will increase blooms and foliage will be greener. Also watering will help prevent leaf scorch which occurs when the tips of daylily foliage turns brown.
Deadheading Daylilies
Believe it or not, daylily flowers usually only bloom for one day. Most people don’t realize this though because each stem has several blooms which makes the plant have constant color.
After several weeks of spitting out beautiful blooms, the plant will eventually slow down its flower production and what you will be left with is a bunch of seeds on top of long stems. It is best at this point to cut the stems that are forming seeds down to the base of the plant using good pruners. This is often referred to as deadheading.
Deadheading daylilies has 3 main benefits:
1. By removing the seeds left over from the spent flowers, the plant can focus once again on flower production instead of seed production. This means you will likely get more flower blooms.
2. Deadheading daylilies helps restore overall energy back into the plant and plant roots.
3. Deadheading makes your plant look better. A plant covered in seeds is not very attractive. By cutting off the seeds and spent stems you can enjoy the green foliage of the daylilies instead.
Now, if the thought of going out into your landscape and hand pruning each daylily sounds horrible to you then don’t worry, it’s not necessary. If you’re not looking to spend more time in your garden on daylily care and maintenance then don’t add this to the list.
Dividing Daylilies
Do you really need to divide your daylilies?
Probably not. This is why I try and emphasize to people the importance of where you are planting them in your landscape.
As said earlier, I prefer planting daylilies in masses. But if I’m planting them among other plants it is probably a good idea to thin them out by dividing them occasionally.
If you’re looking to add more daylilies to another part of your landscape then dividing daylilies is a great way to get free plants! Dividing daylilies is best in early spring or early fall.
When to Cut Back Daylilies
Most advice circling the internet will tell you to cut back daylilies in the fall. And yes, that is fine. But personally, I wait until early spring to cut back.
My main reason for this is in fall, daylilies can be a little tough to cut back. You usually have to go around with a good pair of pruners and manually cut each individual plant back. I have so many daylilies in my landscape that this would take me too long.
It is much easier to wait until early spring when there is basically nothing left of the plant. At this time I don’t need pruners. I can simply go around and pull or rake the dead leaves free.
Another added bonus of waiting until spring is you are safe from cutting back too early. Daylilies can have green foliage very late into the season. This green foliage is good for photosynthesis and important for bringing energy into the roots of the plant. If you cut them back too early then you are cutting off the energy supply to the plant.
Check Out These Posts Next
Follow Me
Join my free email list!
When do I plant the seeds? Can I plant them in the fall, so they come up in the spring?
it depends where you are but for the most part sowing seeds in the ground is better to do in the spring. You could also start them indoors under lights in late winter and plant them out in the landscape in the spring. check out this tutorial: seed starting
I was burning some of the weeds and the fire get around some of my lilies. Will they be fine
It’s tough to guess without knowing the extent of the burning but daylilies are tough so it could just be some leaf damage.
Are the seeds after deadheading the daylily usable?
Yes they are… You can wait until the daylily creates a seed pod. In the seed pod should be about 6 seeds. You can plant these seeds. Just know that these will be unique plants that won’t be a direct clone of the plant it came from. I actually think its fun seeing the different variations that form!
What cause daylilies leaves to turn yellow and how can I fix? Do I need to fertilize and if yes what type is best?
Hi there… There’s a couple of reasons daylily leaves could be yellowing this type of year. Depending on your location, if you’re experiencing a lot of cloudy, rainy, and/or cold weather the plants could be a little sluggish and yellow. Also, daylilies prefer rich, organic soil. You could try to amend the soil with some composted manure. Really try and mix it in around the soil of the plant. Lastly I would recommend incorporating Epsom Organic Fertilizer. Also, make sure that the daylilies aren’t in constant soggy soil. This could lock up nutrients. Those are some pretty simple solutions to give a shot, good luck!
When you speak of deadheading & cutting the seeds off, where do I stop cutting? I wish that you had a picture to show me where to stop.
Hi there… It’s really simple. Just cut the whole stalk back. So if you start where the seed pod is and follow that stalk all the way down into the base of the plant you can cut it off down there near the base. But even if you just cut the top seed pod off, or half the stalk, the whole stalk will die back anyway so it doesn’t really matter. It’s one of those things you can’t really screw up so definitely don’t be afraid.
I bought a pot of daylily and planted in my garden. It looked good for the first 2 or 3 years. Then, in the fourth year it grew into something else. I mean the leaf and stalk is daylily, but the flower itself is different. It looks like a wild flower with furry and brown thing. I saw the one looked like this in someone else garden in my neighborhood. What exactly happened to it?
Hi Ann… what probably happened is your daylily went to seed last year and your seeing a new type of daylily growing this year. Daylilies are not true to seed, so if you took a seed from a hybrid daylily and planted it in the ground you wouldn’t get a clone of the same plant. Instead you’d get something that looks very different. That’s why it’s recommended you prune off seed pods that form later in the year.
My daylillys got flattened. What do I do?
Hi Michael, did they do these on their own or were they run over by something. If they did it on their own it could be either way too much, or way too little water.
An animal crushed them down in early June.
I’m in zone 8b. It is January. We dug all my daylilies on the hill we planted to help with erosion. We did not prep very well, and weeds…running grass, began to choke them out, so we dug the daylilies and are solarizing the soil and will plant bulbs back in spring..how do I store bulbs till then…about 2 1/2 months.
Hi Karen! I would do something called “heeling in”. To heel in a plant is to cover the roots with soil until you’re ready to plant them. You keep the soil moist too so they don’t dry out and can drink if they are not dormant. You can put several clumps of daylilies right next to each other and simply mound soil over the roots. Just be careful not to cover the crown or leaves of the plant sense that can damage it. When heeling in plants I’d find a location that’s out of the sun. At my old host I had the perfect spot underneath my deck where it was tall enough for me to get under. It was the perfect location and I heeled in tons of plants until I was ready to plant them.